I’ve been getting a few questions from Windows users about accessing WSL files in Windows and vice versa. I was originally going to wait with this for the next labs, but since this might actually make things a little clearer for some, I’ll just post the information here instead. If anything’s unclear, just wait for the second lab and I’ll probably be able to explain things better in person.
The WSL distributables (i.e. Ubuntu) are kind of like another machine running within your computer. It just features a Unix command-line interface (that’s the terminal, i.e. the bash shell), so the development tools and experiences are pretty limited. You can run vim, nano, or even emacs (might need to be installed) in the terminal to edit your files, but if you want to use a full-fledged IDE you’ll normally have to edit the files on the Windows side and then transfer them over to the Linux environment in WSL.
When we start working with Python, R and jflap, you can probably just solve the exercises on Windows, since you don’t need Linux to write Python or R code. Of course, you can always install python3 in Ubuntu, but you won’t have access to an IDE (unless you follow the guide in the last part of this post).
Accessing your WSL files in Windows
If you are using WSL 1, this should probably work fine most of the time. However, if you are using WSL2, it probably won’t. WSL2 doesn’t like it when we edit files in both Linux WSL and in Windows. WSL1 doesn’t like it either, but it’s possible to do, and I’ve tried so myself many times now without issues.
To access your Linux files in Windows, open the Ubuntu terminal and type explorer.exe . (include the punctuation mark). This will open the linux directory in Windows Explorer, with the WSL prefix “\wsl$\Ubuntu-18.04\home\your-username”.
Now, you’ll notice that Windows treats your Linux environment as a second network. This is because, as I’ve stated earlier, the Linux environment is completely separate from the Windows environment and transferring files between these environments is very similar to transferring files between computer networks. I always recommend that you copy the file you want over to a Windows folder before editing it, so that you won’t mess up the original if the file gets corrupted.
PS: To copy the file, run
cp [filename] [destination], like this:console cp file.txt /backup/new_file.txt
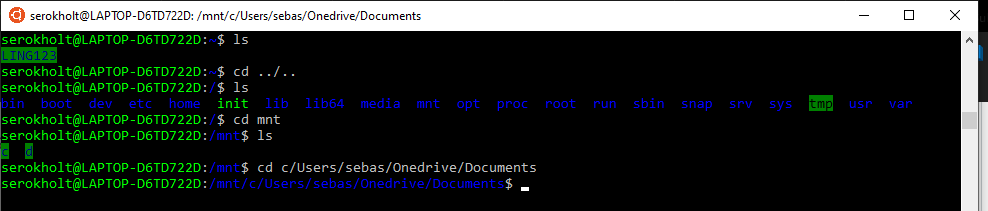
Accessing your Windows files in the WSL terminal
Similarly, you can also open your Windows files in the Linux environment. Just use the cd command to navigate to your WSL root folder, then navigate into the mnt folder to access your C: drive. See the example below for more details. As you can see, I managed to access my Documents folder. Make sure to enter your own username when you try this yourself.
I recommend you to use the cp command to copy the files you need from Windows to your Linux environment, so that if anything should get corrupted you’re not going to mess up the original file.
Working in WSL with VScode
VScode is a full-fledged IDE from Microsoft, which has very recently released support for editing Linux files remotely. This means that you can open VScode from the Ubuntu terminal, run it in Windows, but edit the files in Linux while also being able to access the Linux terminal and viewing pathnames and home directory correctly. I’ve tried it out today, and… it just works!
So if you insist on using an IDE to edit your Linux files directly, even though you won’t really need to in this course, you can do it by installing the Remote - WSL extension for VScode. See the documentation and guides here.
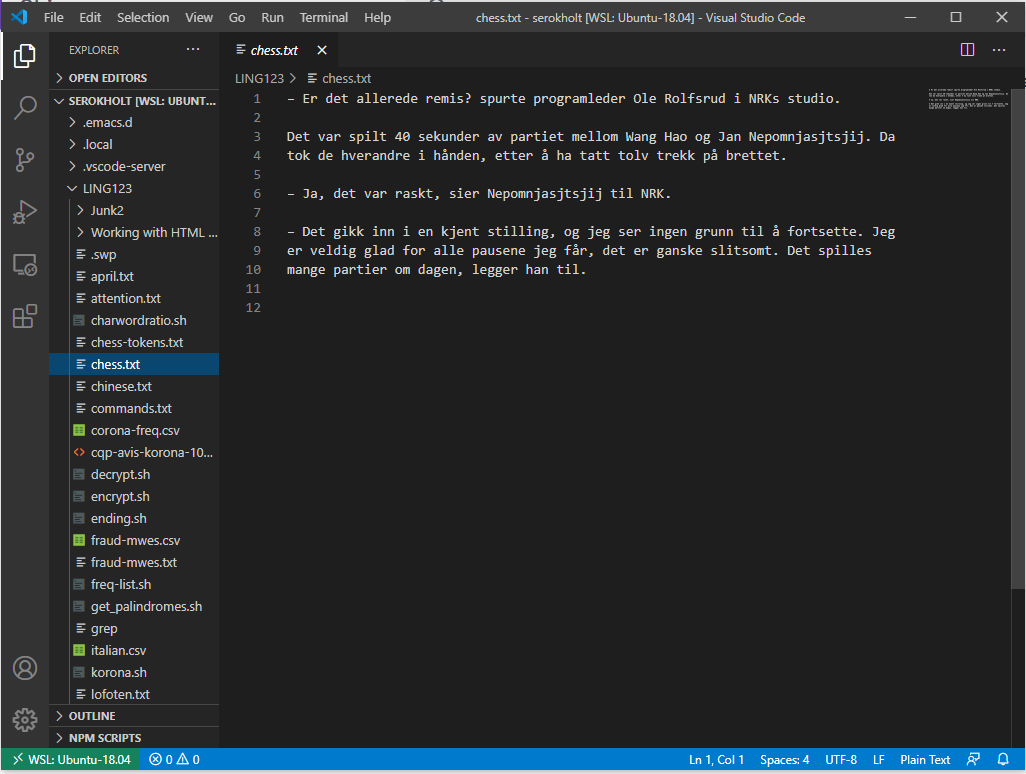 VScode editor with WSL-remote enabled